Free Video Tutorial: How to Fire Stones in Metal Clay

One of the most frequently asked questions I hear during a metal clay workshop is: “Can you fire stones in metal clay?” My reply is always, “yes, within limits.” CZs, some natural faceted stones, cabochons, and even pearls are all well suited to metal clay, with the right techniques. Thanks to the many modifications made to fine-silver metal clay since its debut, you can fire many different materials in metal clay.
ABOVE: Shooting Sapphire Pendant by Tammy Honaman, Easy Metal Clay
Cool Tools, Rio Grande, and other companies have taken a painstaking amount of time to test stones to be able to bring you charts filled with valuable information. But before you try this with stones, there are a few things to know.
1. There is a short list of stones that can tolerate the needed firing temperature for achieving proper sintering in the metal clay.
2. You should test your stones prior to using in your design.
3. You can set the stones in place in a few different types of settings.
4. If you want to use a stone in your design that can’t tolerate the heat of the kiln, like pearls, you can fire a setting in place then set the stone once the piece is complete.
Stones You Can Fire in Metal Clay
Generally speaking, CZs and lab created gemstones are almost a sure fire (pun intended) bet for surviving the temps needed to sinter metal clay properly. Many can even withstand the heat needed for the highest recommended firing temperature, 1650 degrees Fahrenheit. For natural gemstones, the lower temperatures needed for firing PMC3 correctly, open up other options. For example, you can fire fine silver metal clay as low as 1110 degrees F for 45 minutes, which then allows you to add moonstones to your metal clay design as well as labradorite and star diopside—sterling silver too!

One way to know if your stone can handle the temperature needed to properly sinter the metal clay is to fire the stone in a kiln cycle on its own. This means running the kiln through your metal clay firing schedule before placing it into the metal clay and creating your design. If the stone survives the firing, then it will survive a second firing in metal clay. 3. You can set a stone in a few ways, and likely more than what I can share with you here. To follow is one simple option.
Set your stones with the help of this video tip…
Setting a Stone in Metal Clay with a Bezel

Roll out, texture, then shape a design using fine-silver metal clay. While the clay is still raw, follow these steps, excerpted from Shooting Sapphire Pendant in Easy Metal Clay. Using a piece of brass tubing, cut out a hole to be used for stringing your pendant.
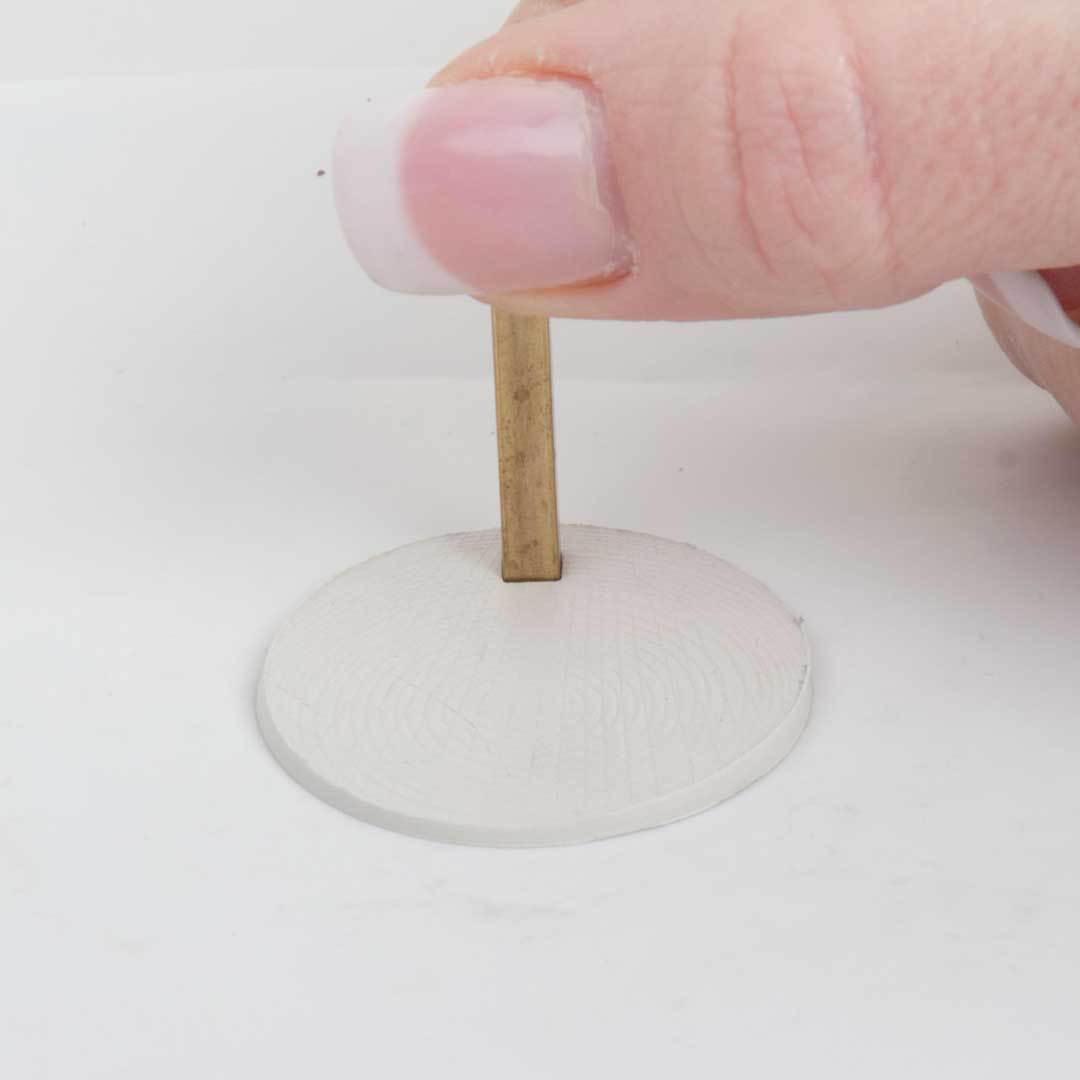
Grip the stone in a pair of tweezers and decide where you want the stone to be placed on your pendant. Place stone into the clay at the designated spot.
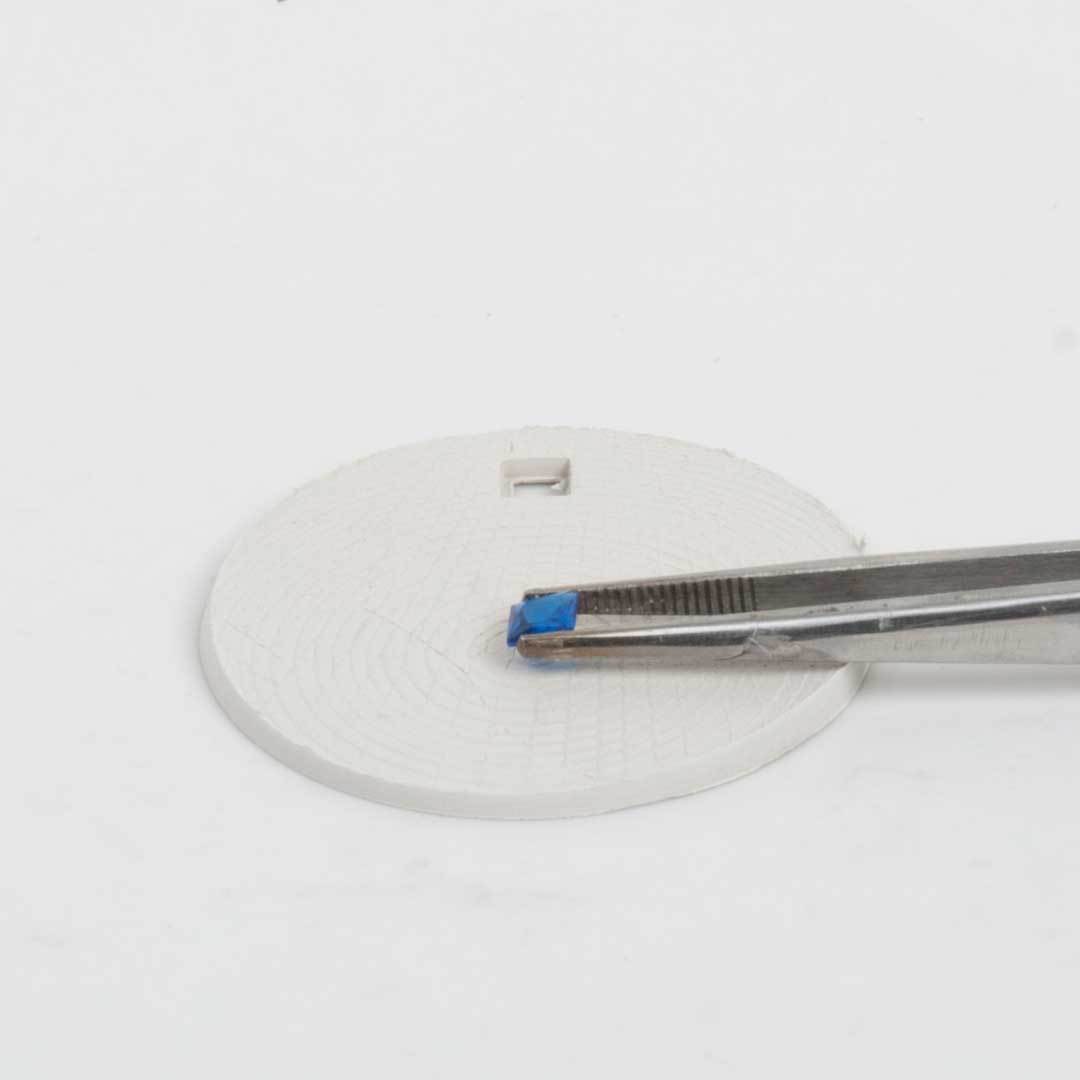
Press the stone into the clay so it is just below the surface of the pendant; a little bit of clay will come up from the sides as the clay displaces which will help “set” the stone into place. Make sure the stone is level.

Using a square cutter, cut out a square from the pendant. Repeat to cut out a few squares between the stone and the hole for hanging the pendant. Roll a piece of clay out to 2-cards thick. Press a large square cutter into the clay. Press a square cutter (smaller than the first cutter) into the center of the square just cut out. This will form a “square ring” of clay.
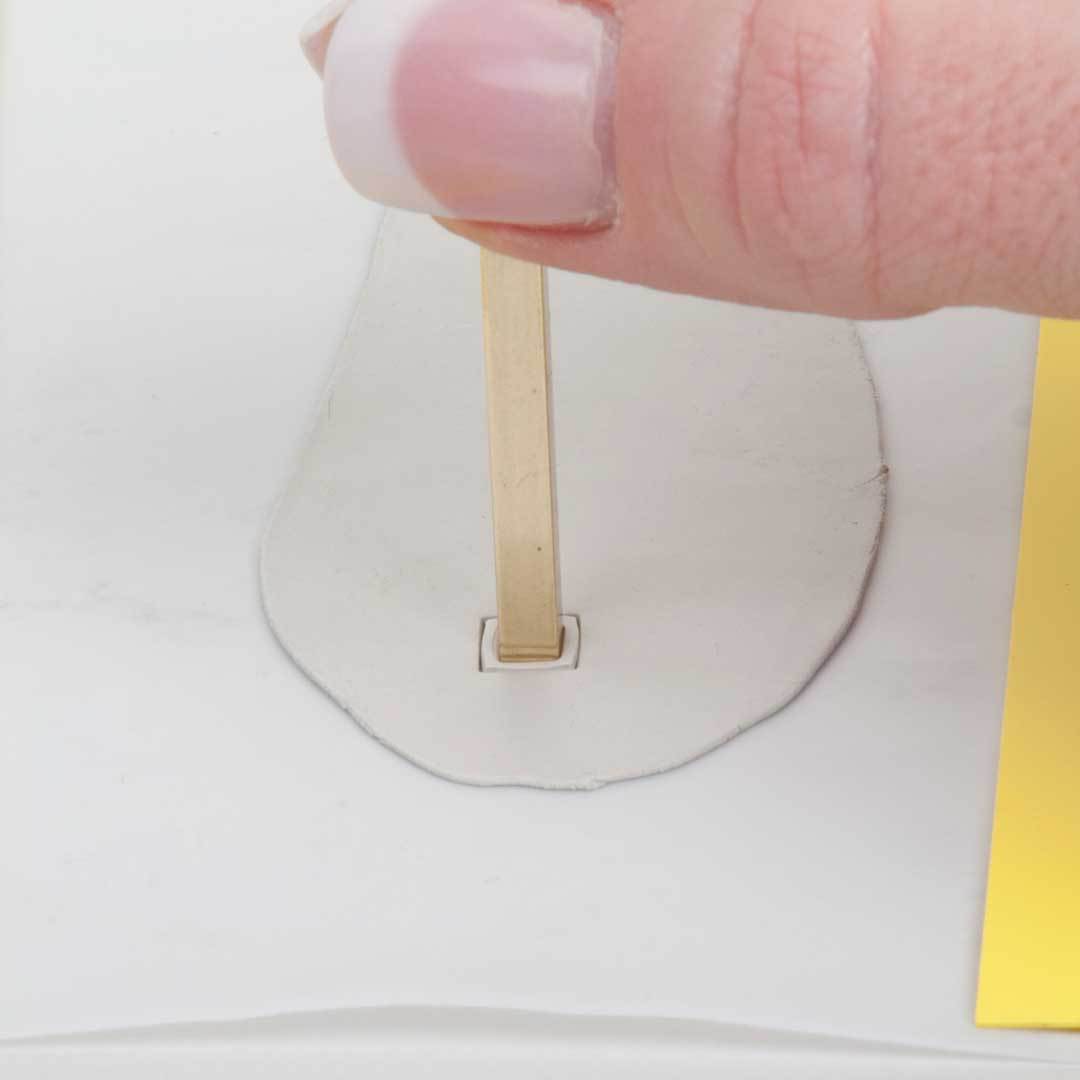
Using a paint brush, apply a little bit of water to the area around the hole on the top of the pendant. Using the paint brush again, lift the square ring and place it over the opening. Apply a little bit more water then press onto the square ring so the two surfaces join. Repeat to place a ring around the stone.

Refine the surface of the pendant until it is as perfect as you can get it. Place the pendant onto a kiln shelf in the kiln. Ramp to 1400 degrees F and hold for 20 minutes. Allow the kiln to cool to room temperature. Using a brass wire brush, burnish the pendant to bring up the shine. If a high polish is desired, tumble in a tumbler with mixed stainless steel shot and burnishing compound (mixture of a little mild-soap and water will work).
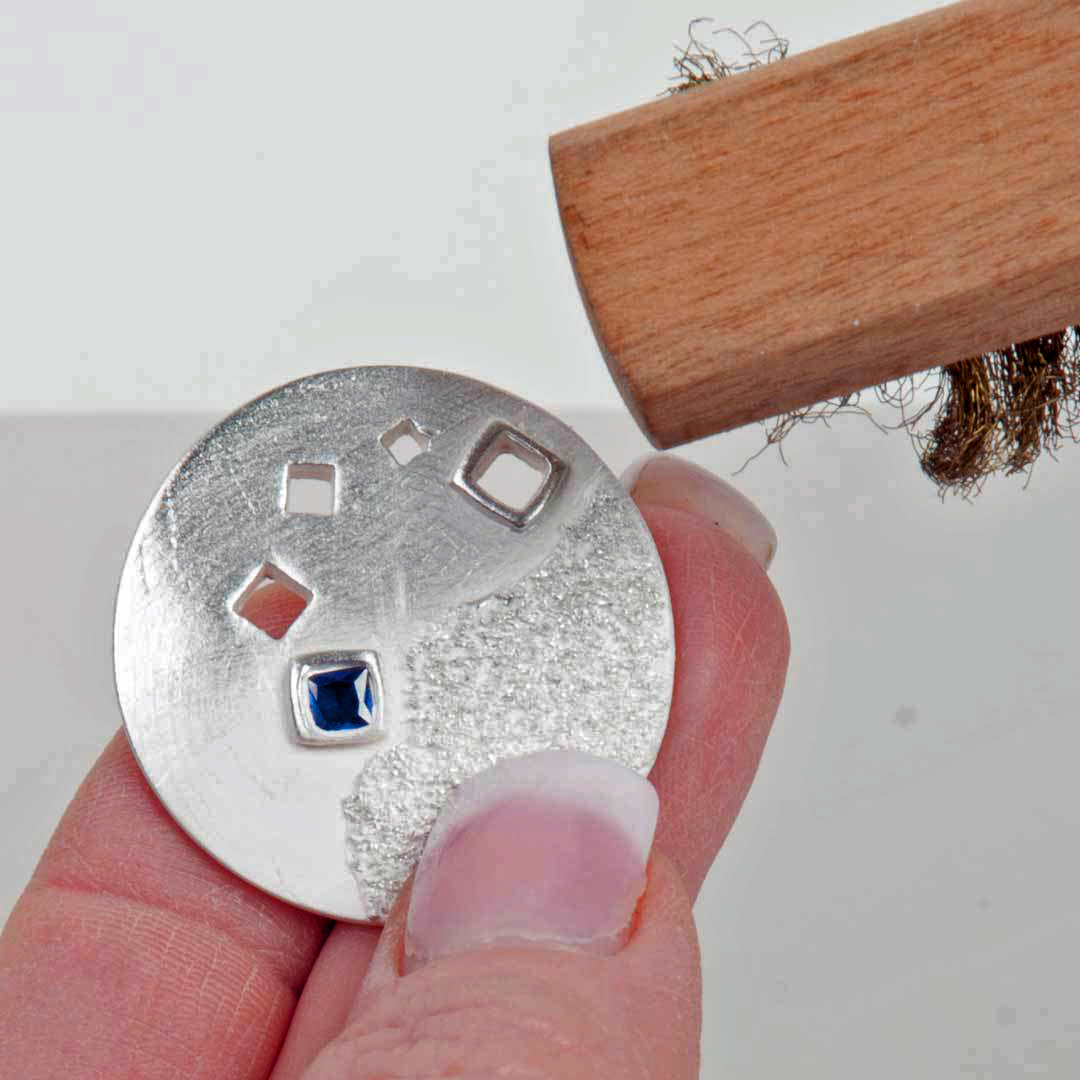
For complete instructions on this design, please download a copy of the magazine.
No Bezel Required

Another option I love, is a design that doesn’t require a bezel, at all! Enter, stone setting burs! To follow are a few basic steps for this technique. Create a design to your liking (I’m showing a simple charm).

Choose a stone and matching drill bit, i.e. 3mm stone needs a 3mm stone setting bur. While the clay is still wet, place the appropriately sized bit into the clay, where you want the stone to rest. This will be a great pilot depression. Allow the clay to dry.

Once the clay is dry, refine it so it’s ready for firing. Use the drill bit to really drill the clay to the right depth for the stone’s height. You want the stone seated just to the level of the clay so when it shrinks it holds the stone in place.
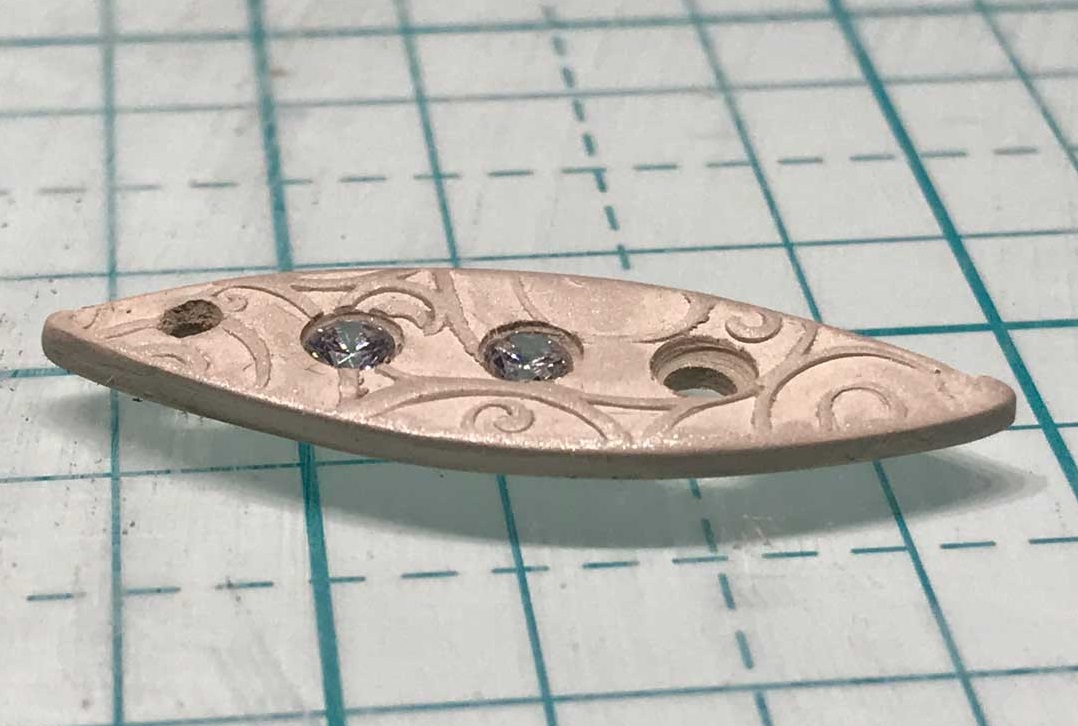
Add a bit of paste to the drilled opening then set the stone into the paste. Neaten up the edges then allow the clay to dry.

Refine the area where you set the stone, as needed. Fire the design based on the temperature you determined to be suitable for the stone’s survival and so the metal clay is fully sintered.* Allow the kiln to return to room temperature before removing the fired pieces. Finish the metal using a brass brush or other polishing method of your choosing. *Ideally, fine silver metal clay designs are fired at 1650 degrees for 2 hours but that isn’t always possible when you have inclusions in your design.
What to Do When the Kiln Temperature is Too Hot for Your Stone

When you have a stone that’s perfect for your design but it won’t survive firing, you have options! You can create a bezel using traditional fine-silver bezel wire and embed it into the clay. To do this, create a soldered bezel for your stone. Create a metal clay design; then set the soldered bezel in place while the clay is still raw. Fire the design as you normally would; then set the stone after the design has been polished. This is the method used to create Lost in Time, above. You can also incorporate findings in your design, like a prong setting, then mechanically set your stone once the design is polished. In the surfboard design, there are stones set as described above in No Bezel Required, as well as a piece of fine-silver wire placed into the design pre-firing. A pearl is set onto the wire using adhesive, post polishing.

Tammy Honaman
Director of Content, Interweave
Learn more about setting stones in metal clay:
-

Hidden Catch Bracelet Project Download
$7.99
-

Quilling Reborn Earring Project Download
$7.99
-

Open and Close Bracelet Project Download
$7.99
-

Getting Started Precious Metal Clay Series: Torch Firing Projects: Faceted Stone Earrings
$24.99
-

Getting Started Precious Metal Clay Series: Torch Firing PMC Introduction Online Workshop with Darlene Armstrong
$24.99
-

Linked Metal Clay Bracelet with Stones Project Download
$7.99
-

Metal Clay and Diamond Earrings Project Download
$7.99
-

Easy Metal Clay, 2011 Digital Edition
$14.99


Join the Conversation!